How to Update Node Js Using Terminal? 2025
Learn how to update Node.js to any version using NVM (Node Version Manager) with simple terminal commands. Manage multiple Node.js versions easily.
Updating NodeJs manually can be a bit hectic, so today I am going to show you how you can update NodeJs to any version locally with just a few commands.
NOTE: If you don't have any idea about NodeJs and wondering what NodeJs is, you can read our article on NodeJS.
Why Use a Version Manager Instead of the Installer?
You can update Node.js by downloading the latest installer from the official website every time — but that approach has real drawbacks. It replaces your existing version, so if a project needs an older release you're stuck reinstalling. It also often requires admin rights and can leave conflicting global packages behind.
A Node Version Manager (NVM) solves all of this. It lets you:
- Install multiple Node.js versions side by side.
- Switch between them per project with a single command.
- Upgrade or roll back without touching your system installation.
This matters because real projects pin specific Node versions. A client site might run on Node 18 while a new build targets Node 22 — NVM lets you serve both from the same machine.
#Step 1 - Install NVM
To be able to run the command to update NodeJs, we need to install a Node Version Manager also called NVM. You can download the latest version of the NVM from here.
After successful installation of the NVM, you can verify the installation executing the following command **nvm version**. If it looks something like the below image, then you've successfully installed the NVM.
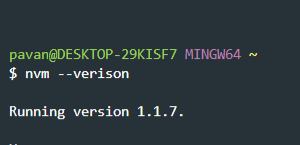
how to udpate nodejs using terminal
On macOS and Linux
The download link above is for nvm-windows. If you're on macOS or Linux, install the original nvm instead with this command, then restart your terminal:
curl -o- https://raw.githubusercontent.com/nvm-sh/nvm/v0.40.1/install.sh | bashThe commands that follow (nvm install, nvm use, nvm ls) work the same way on every platform, so you can follow along regardless of your operating system.
#Step 2 - Update NodeJs
Before updating Node, visit NodeJs official website and check the LTS (Long Term Support) Version. Now, inside your terminal type the below command, instead of the version number, you can put your desired version and hit Enter.
nvm install 14.17.0Tip: For most projects you want the LTS release, not the newest "Current" release. LTS versions receive security fixes for years and are what hosting providers support. To always grab the latest LTS with the original nvm, you can simply run
nvm install --lts.
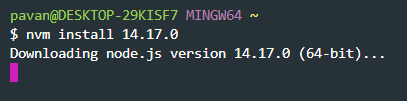
If your terminal looks something like the above, then the update has begun. But, it's not over yet, after the update is finished. You need to explicitly define the version that you need to use.
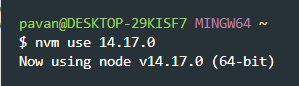
nvm use 14.17.0You can also check all of the NodeJs versions installed on your system by executing the following command.
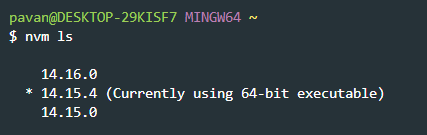
After switching, confirm the active version and its bundled npm with:
node -v
npm -v
More NVM Commands
nvm use [version]which we just saw earlier, it helps us to use any node version installed on our system.nvm onornvm offto enable or disable the version manager.nvm uninstall [version]to uninstall any specific version of node, defining a specific version is mandatory.nvm versiondisplays the version of the NVM installed in your system.nvm use [arch]it can be used to change the architecture of the installed node version to 32/64 bit.nvm lslists every version installed locally and highlights the one currently active.nvm alias default [version]sets the version that new terminal windows use automatically, so you don't have to runnvm useevery time.
Troubleshooting Common Issues
nvmis not recognized: close and reopen your terminal so the updated PATH takes effect. On Windows, run your terminal as administrator during the first install.- Global packages disappeared after switching: global npm packages are installed per Node version. Reinstall them under the new version, or use
nvm reinstall-packages [old-version](original nvm) to copy them over. - Wrong version in a project: add a
.nvmrcfile containing the version number to your project root, then runnvm useinside that folder — nvm reads the file automatically.
Conclusion
Managing Node.js with NVM turns a tedious reinstall into a two-command update, and it lets you keep several versions ready for different projects. Install NVM once, use nvm install and nvm use to switch, and set a sensible default alias so new terminals just work.
I hope this post was helpful, and if it was make sure to share it with your friends! You can also support us by subscribing to our free newsletter.
Also, if you want to contribute any article on our platform feel free to contact us!